Initial Drawings and Research
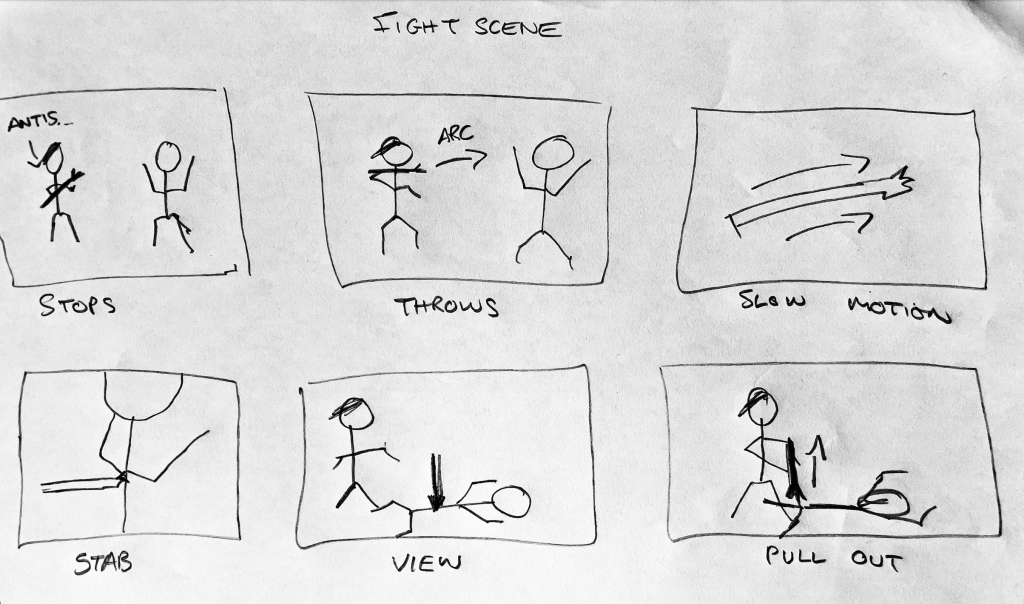
Before even rigging, I drew out some initial ideas for my scenes and what I wanted them to include. From the start I knew I wanted some sort of fight scene which can be seen below. This originally included my character throwing the weapon into the enemy’s back, before pulling it out to retrieve it. This was changed due to my issue with connecting the weapon to the hand, as well as a general change of heart with the overall feel of the scene.
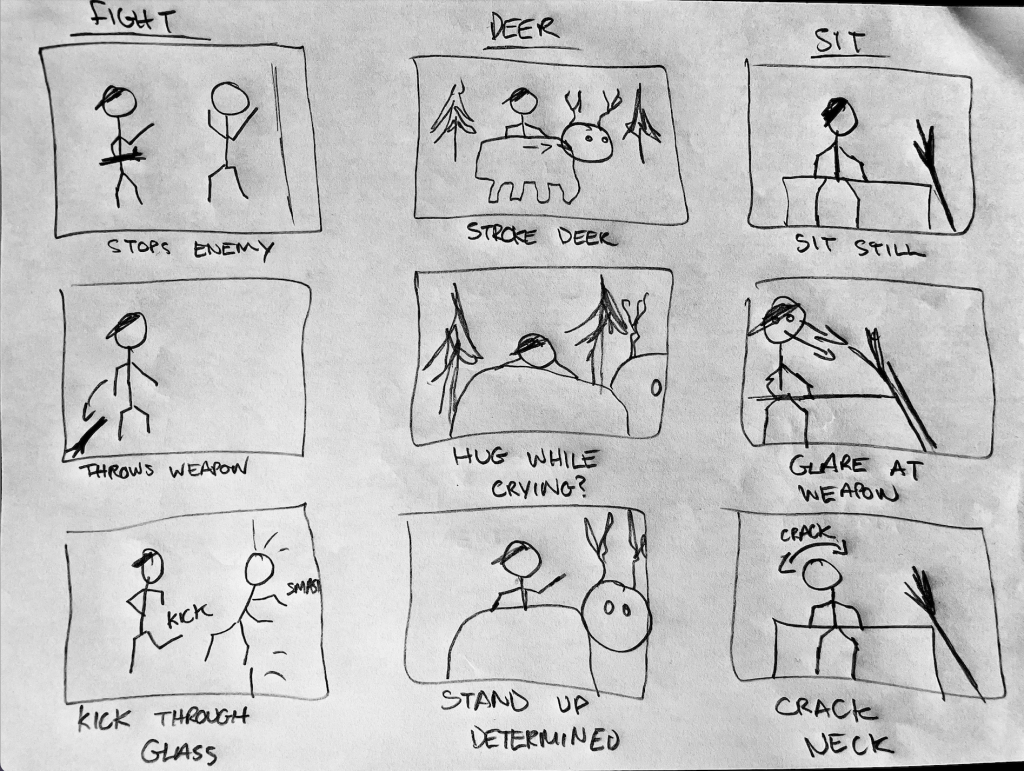
Following this, I redrew my concepts once again in a small storyboard format to show off the three different themes briefly. The fight scene now had the weapon being thrown to the floor and the enemy being kicked through some glass. In addition the other two scenes consisted of a deer asset being stroked while my character looks distressed, and the other being more of an idle style scene where my character glares at his weapon before cracking his neck.
Using these, I was able to begin my animation and loosely follow my documented concepts.
I also searched on YouTube for similar actions that I wanted to possibly experiment with. One of these I ended up loosely using within my fight scene (which can be seen in the video references section) that involved a karate kick. A lot of the karate kicks researched ended up being too over the top for my characters personality which is why I decided not to use many of them. In addition I also tried to find some smaller actions such as cracking a neck sideways as well as stroking an animal, however these are hard to find and any similar ones are hard to reference due to the camera angle. This is why below you will see I had to record my own in order to get the effect I wanted.
Animation
Using my research of actions as well as my storyboard ideas, I began animating within my designed scenery. I saved a copy of my fully rigged character so I can create the different scenes and then I began animating. This involved using the video references I had compiled, positioning my character in the correct starting position and key framing each position until the sequence is finished. Below I have detailed my process into sections;
Video References (Positioning)
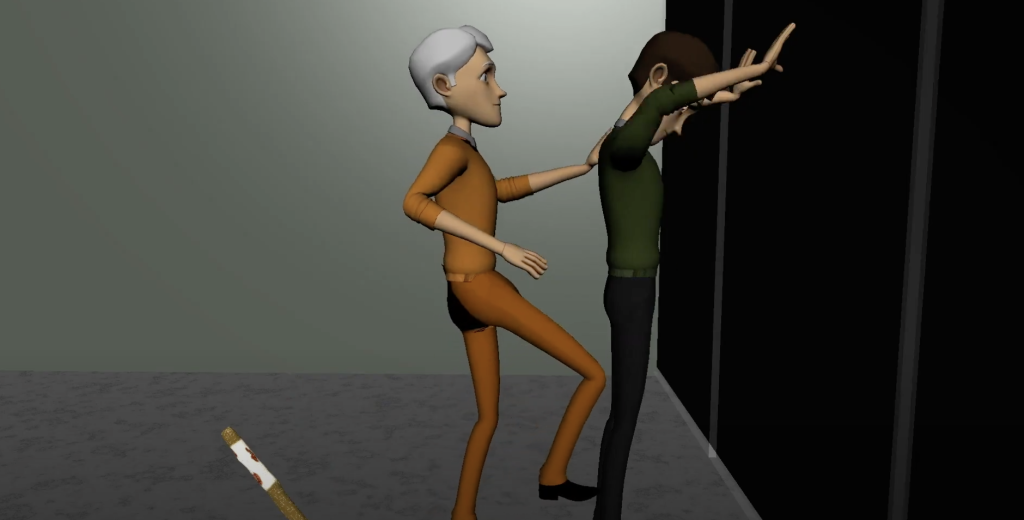
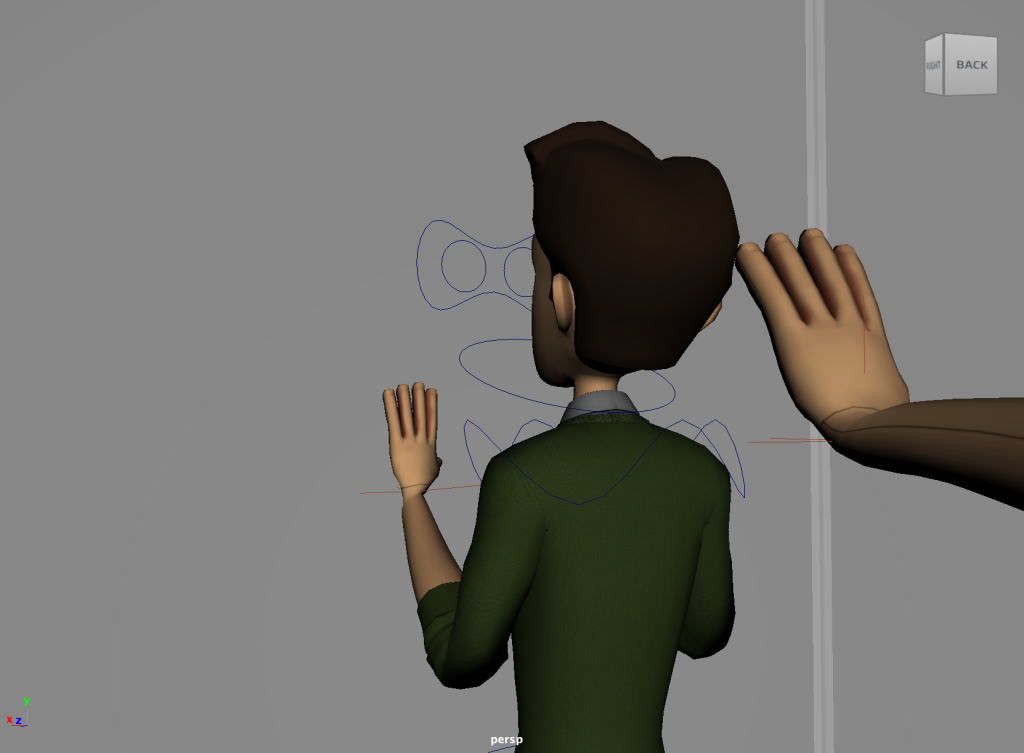
In order to get better positioning with my characters, I used video references that I imported into maya. These could be followed along with and used as a guide for where to position my character. This ranged from scenes from movies, YouTube videos as well as my own. Below is a screenshot in which a video I took myself has been placed in the scene so I could use it as a guide to position my characters hands.
With this particular scene, the video I recorded was slightly awkward to use due to the proportions which is a mistake on my behalf when recording. However it did help with timing as well as a rough position, which I then used to progress with the animation.

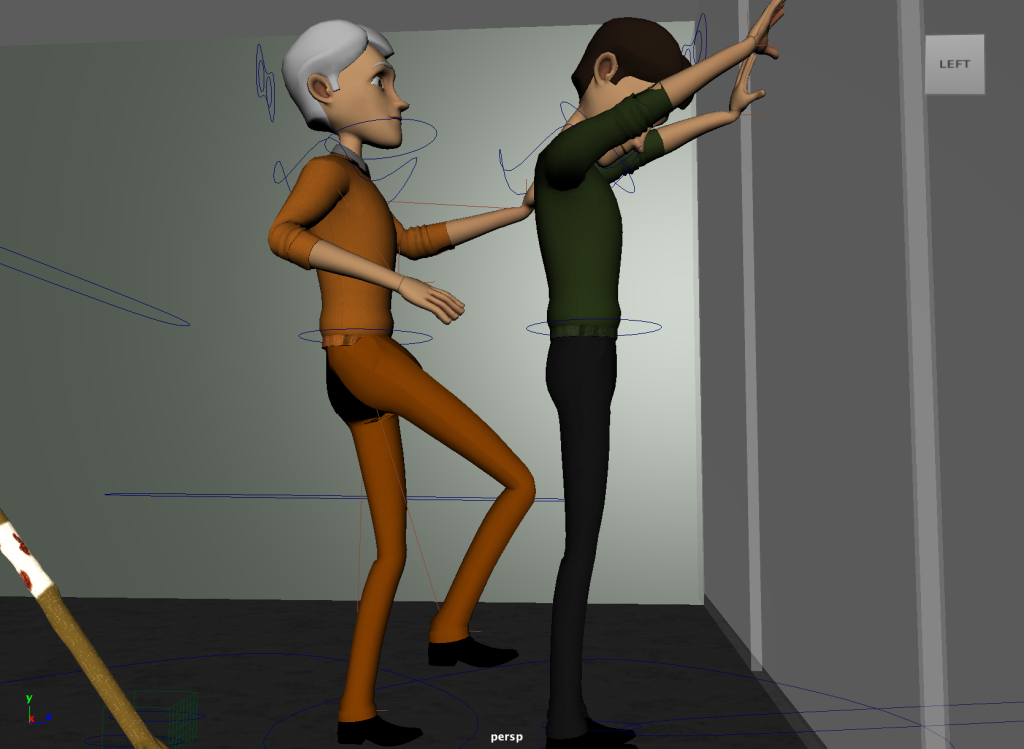
For the below scene, I used a small clip from Scott Pilgrim vs the World (Movieclips, 2011) where Chris Evans cracks his neck (starts at 0:26). This was the clearest scene I could find which was front facing. I wanted my character to crack his neck before glaring at his weapon so this scene was placed inside Maya and used for timing and positioning.
For the fight scene, I took inspiration from a karate kick tutorial video by Black Belt Samery (Black Belt Samery, 2020). I used a section from this (starts at 2:25) to animate my characters kick in the fight scene. I wanted my character to follow through with the kick, however due to the space in my environment, only half the kick was displayed. This video still helped me get an idea of the angles and height that my characters leg should be which was very useful.
Key framing
In order to achieve a sequence of movement, I used key framing to capture each individual movement to then combine into one complete sequence. This was a simple process however I needed to keep in mind certain aspects such as key framing everything needed within the scene rather than individual assets. This was something I did a few times which meant I had to revert back to an earlier action and restart.

Once I had my character in position, by pressing ‘S’ it would set a keyframe of that pose which means it has captured that moment (shown by the red line on the timeline). Next I would move the timeline marker along a frame and then move my characters body slightly in the direction of the desired pose. This is where the previously mentioned video references come in handy as they allow you to see the natural movement frame by frame in order to achieve the desired effect.
This process is repeated until you have completed the animations duration. This can then be viewed by playing the animation at your desired FPS in the bottom right corner. Using this you are able to see if anything looks odd or if the FPS needs slightly altering in order to achieve a more realistic action.
Movement
While animating, I referred to my characters backstory and his strengths and weaknesses so I could therefore create a movement style that suited him. Although I wish I put more emphasis on some of the movements, this research can be seen in my animations such as the fight scene. Due to my characters build, he is quite strong which means it is realistic that he can kick/push someone through a window with ease. Once again with more time I would have liked to have applied the follow through principle to possibly show how my characters strength is sometimes shown more than it needs to.
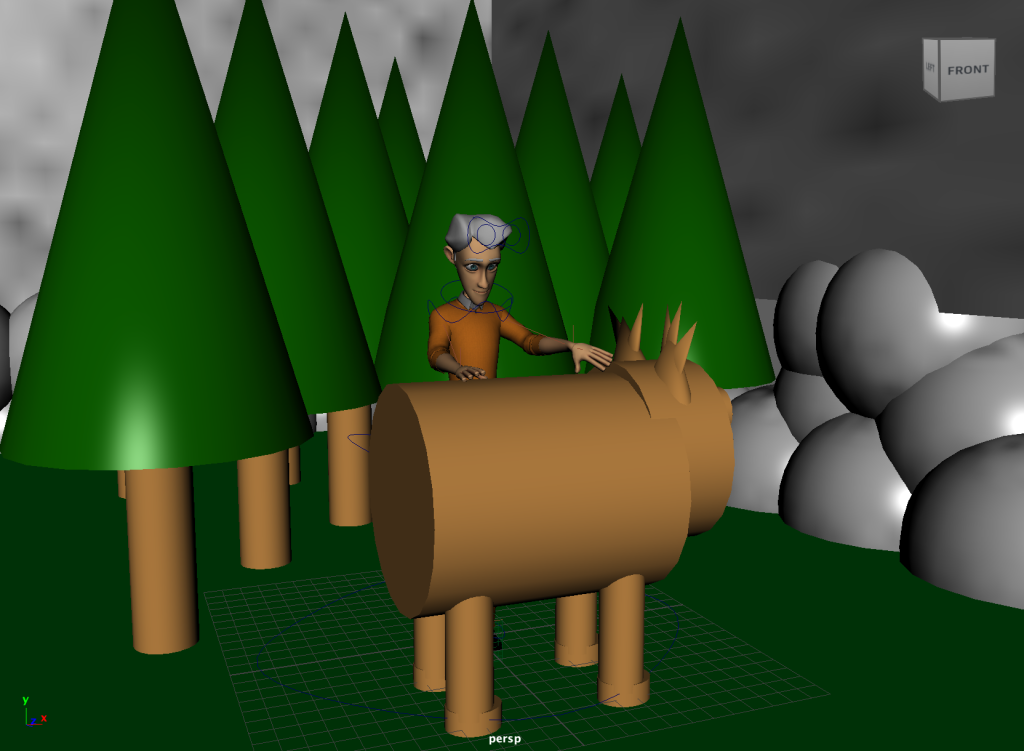
Furthermore, in both of the other scenes, my characters weakness of less energy can subtly be shown through their movements. In the deer scene more importantly, my character bends down for a brief moment before having to get back up again. I did this to show that he can’t bend down for long due to his weight and lack of energy. A way I could’ve improved this would be to slow down the time it takes for him to get up again however I’m still happy with the result of this scene.
Camera Angles
For my three animations, I needed to choose appropriate camera angles for the final render. For this, I played the video on a loop in order to decide what camera angle was best for me. This especially helped on the fight scene since my intentions where to have multiple angles for the different actions. Below is a selection of screenshots from the initial decisions of where the camera would be directed in the final animation.
Rendering
First I created a few new cameras to act as the render camera. In hindsight, there wasn’t much added benefit to this as the perspective camera would have been fine however it’s just good practice. I then oriented my cameras into their positions and changed the rendering engine to Maya Hardware 2.0. In the settings, I enabled GPU instancing and changed the file type to PNG and the resolution to 1080p.
My max lights were set at 8. I could then use the ‘render sequence’ (ensuring I’d selected the correct camera to render) function to render every frame which I placed into the relevant folder. Each frame took roughly 0.2 seconds to render out and I did this for each camera angle on each scene. Once every frame had been rendered and placed in a named folder to keep things organised, I opened up blender and used the video editing function to piece the frames together. I began by setting the video file output and setting the resolution to 1920×1080 as well as setting the correct frame rate. I then used the ‘add image sequence’ function to add every single frame to the timeline. I could then render the animation and proceed to do this with each image sequence.
An alternative option to combine all the frames together would have been to use a separate program, possibly from the Adobe suite, however my chosen method was recommend to me since it is easy to do and efficient.
Issues
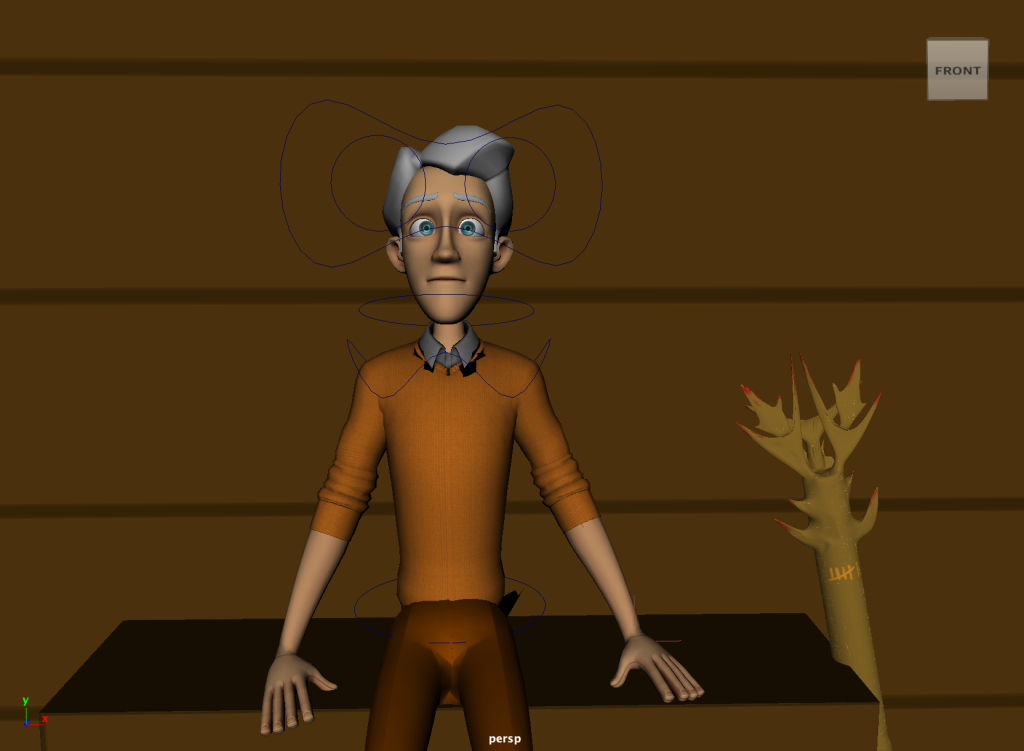
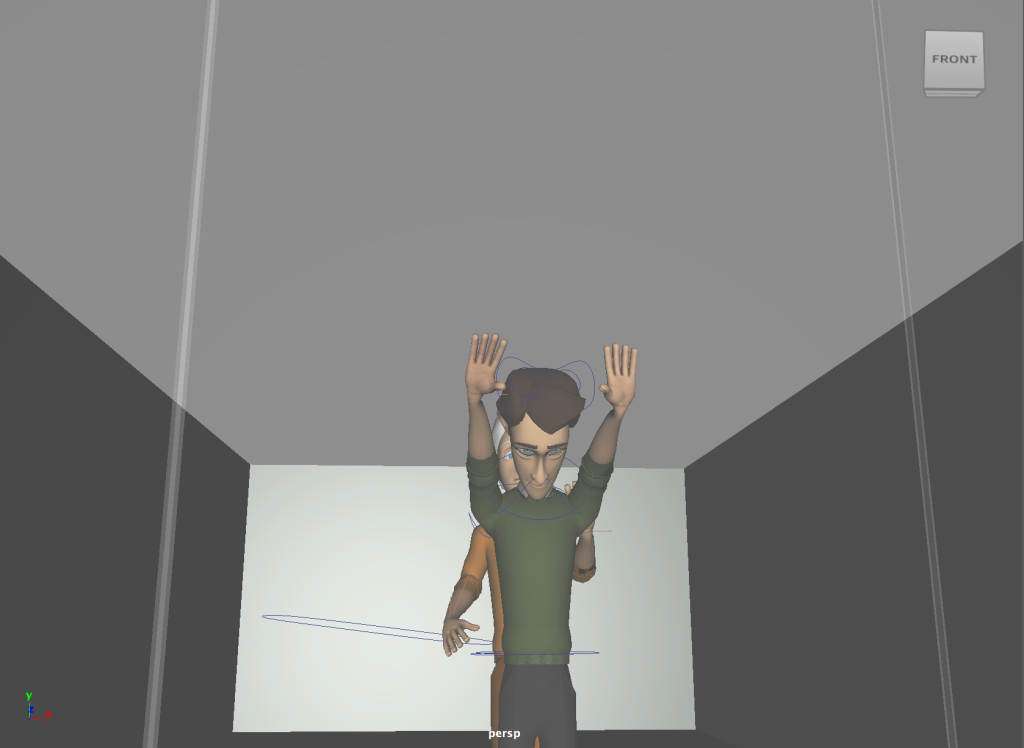
When creating my animation, I ran into a few different issues that effected different parts of my project. One of these being visual glitches that occurred in some parts of the body when moving certain IK handles. This is easily solved by going further in depth to the weight painting menu and investigating where one part is effecting another part (when it shouldn’t) This can be seen below where once the arm is raised, the hip kicks out parts of the mesh.

I originally tried to use Arnold renderer, which gave me some very nice results, however each frame took between 30-39 seconds to render which isn’t feasible for a 800-1200 frame animation for example. Another issue I had during the render process was when I would render the ‘The Last Deer’ scene, it would only render 10% of it. This was an easy fix and didn’t take long to solve, however it was odd since this didn’t happen with the other two scenes.
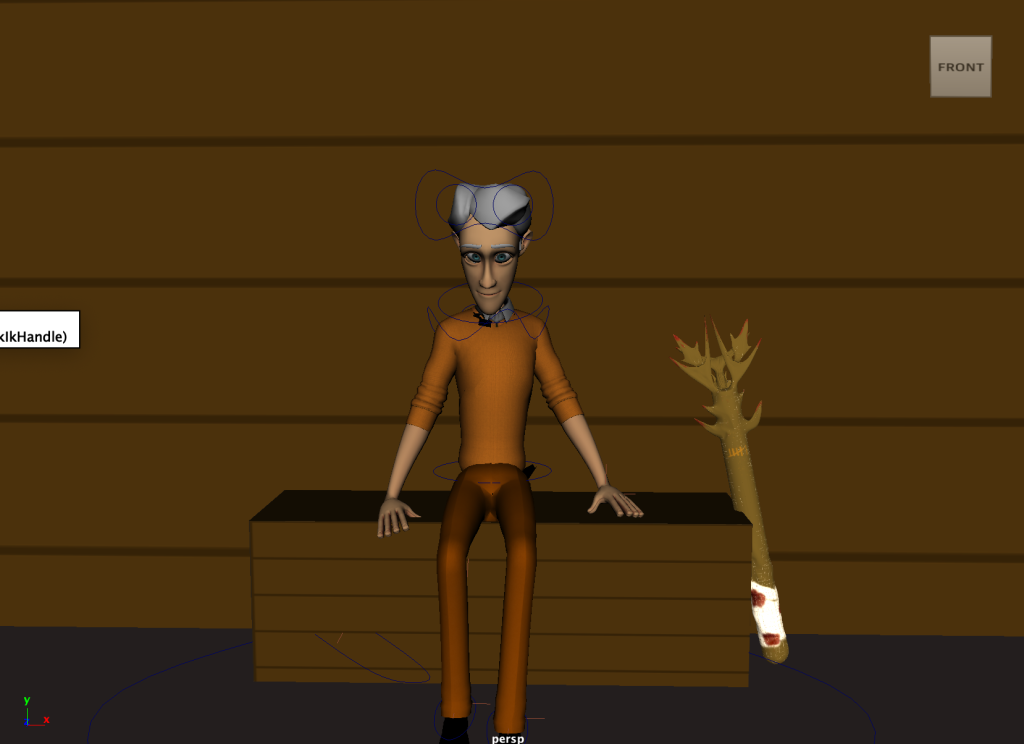
Finally, one problem I encountered was I was unable to attach the weapon to my characters hand. This was the main reason why I scrapped my original idea of throwing the weapon since it would have taken too long to keyframe each individual movement before throwing it. To combat this, I had my character drop the weapon which also creates a sense of anticipation and suspense before he kicks the enemy.
Overall, the animation process went quite well once I got the hang of it, considering my experience and time constraints. If I had more time, I definitely would have gone back and solved issues such as the visual painting glitch in order to achieve a more professional animation.
References
Movieclips (2011) Scott Pilgrim vs. the World (1/10) Movie CLIP – The A-Lister (2010) HD. YouTube. Available online: https://www.youtube.com/watch?v=ILwoKfeDJO4&ab_channel=Movieclips [Accessed 10 May 2022].
Black Belt Samery (2020) Learn Martial Arts: 3 Basic Kicks for Beginners. YouTube. Available online: https://www.youtube.com/watch?v=e64AtWekQVo&ab_channel=BlackBeltSamery [Accessed 10 May 2022].